
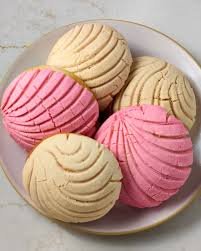
Conchas (Pan Dulce) Recipe (Step-by-Step Guide)
Conchas are the most iconic of all Mexican sweet breads — a soft, pillowy enriched dough roll topped with a crumbly, scored sugar paste (cubierta) that bakes into a distinctive shell or crosshatch pattern. Concha means “shell” in Spanish, which perfectly describes that beautiful, textured top. They are found in panaderías (bakeries) all across Mexico and wherever Mexican communities have settled in the United States — from San Antonio to Los Angeles to Chicago. They are breakfast, they are merienda (afternoon snack), they are comfort on a plate.
What I love about making conchas at home is that they look far more impressive than the actual work involved. The dough is a basic enriched bread — eggs, butter, milk, flour, yeast — and the cubierta is essentially a three-ingredient shortbread paste you press on top. You don’t need a stand mixer (though it helps). You don’t need fancy equipment. You need patience for two rises and the restraint not to eat them all before they cool completely. Trust me on that last part.
Recipe at a Glance
• Prep time: 30 minutes (plus 2–3 hours rising time)
• Cook time: 18–22 minutes
• Total time: ~3.5 hours
• Difficulty: Intermediate (some yeasted bread experience helpful)
• Yield: 12 conchas
• Course: Breakfast / Bakery / Snack (merienda)
• Region/Origin: Nationwide, Mexico (French-influenced, fully Mexican in character)
Ingredients
For the Sweet Dough (Masa Dulce)
• 3 ½ cups (440 g) all-purpose flour, plus more for kneading
• 2 ¼ teaspoons (7 g / 1 packet) active dry yeast
• ½ cup (120 ml) whole milk, warmed to about 110°F (43°C)
• ⅓ cup (65 g) granulated sugar
• 1 teaspoon fine salt
• 3 large eggs, at room temperature
• 1 teaspoon pure vanilla extract
• ½ cup (115 g / 1 stick) unsalted butter, softened and cut into tablespoon pieces
Substitution notes: - Bread flour can replace all-purpose for a slightly chewier, more structured crumb — either works well. - Lard (equal amount) is the historically traditional fat and produces a more tender, slightly flakier concha with deeper flavor. Use it if you can find it at a Latin market. - Instant yeast can replace active dry — use 25% less (about 1 ¾ teaspoons) and skip the proofing step, adding it directly to the dry ingredients.
For the Sugar Topping (Cubierta)
• ¾ cup (90 g) all-purpose flour
• ¾ cup (90 g) powdered sugar
• ½ cup (115 g / 1 stick) unsalted butter, softened
• 1 teaspoon pure vanilla extract
• For chocolate cubierta: add 2 tablespoons Dutch-process cocoa powder
• For pink/strawberry cubierta: add 3–4 drops pink gel food coloring and ½ teaspoon strawberry extract (optional — vanilla alone is also traditional)
For Baking
• Parchment paper-lined baking sheets
We offer catering services in and around Austin, TX and Texas Hill Country. Inquire HERE.
Step-by-Step Instructions
1. Proof the yeast. Combine the warm milk, a pinch of sugar, and the active dry yeast in a small bowl. Stir gently and let it sit for 5–10 minutes until foamy and fragrant. If nothing happens after 10 minutes, your yeast is dead — start with a fresh packet. This step is non-negotiable: it’s your first signal that the bread will work.
2. Mix the dry ingredients. In the bowl of a stand mixer (or a large mixing bowl if working by hand), whisk together the flour, sugar, and salt. Make a well in the center.
3. Add the wet ingredients. Pour the foamy yeast mixture into the well along with the eggs and vanilla. Mix with the dough hook (or a wooden spoon) until a shaggy, rough dough forms. It will look ragged — that’s fine.
4. Add the butter gradually — this is the key step. With the mixer running on medium-low, add the softened butter one tablespoon at a time, waiting for each piece to fully incorporate before adding the next. This process takes about 8–10 minutes. Rushing it by dumping all the butter in at once breaks the gluten structure and gives you a greasy, dense bread. Be patient here. By the time the last piece of butter is in, the dough should be smooth, slightly tacky, and pulling cleanly away from the sides of the bowl. Knead 2–3 more minutes. If kneading by hand: After the butter is incorporated, knead on a lightly floured surface for 10 full minutes. The dough should pass the windowpane test — stretch a small piece thin enough to see light through it without it tearing.
5. First rise. Shape the dough into a smooth ball and place it in a lightly greased bowl, turning once to coat. Cover tightly with plastic wrap or a damp kitchen towel. Let rise in a warm, draft-free spot for 1 to 1 ½ hours until doubled in size. A turned-off oven with just the light on works beautifully.
6. Make the cubierta while the dough rises. Beat the softened butter and powdered sugar together in a bowl with a fork or spatula until smooth and creamy. Add the flour and vanilla and mix until a stiff, Play-Doh-like paste comes together. Divide the paste into portions: leave some plain (white), mix cocoa into one portion for chocolate, and gel food coloring into another for pink. The cubierta should be firm enough to hold its shape but pliable enough to press flat without cracking.
7. Shape the conchas. Punch down the risen dough and turn it onto a lightly floured surface — you’ll notice a faint, warm sweetness from the butter and vanilla as you work it. Divide into 12 equal pieces — a kitchen scale is your friend here, about 65–70 g per ball. Roll each piece into a smooth, tight ball. Place on parchment-lined baking sheets, spacing them at least 3 inches apart (they will expand significantly). Flatten each ball very slightly with your palm.
8. Apply the topping. Pinch off a ball of cubierta roughly the size of a golf ball for each concha. Press it flat between your palms (or between two sheets of plastic wrap) until it’s a disc just slightly smaller than your dough ball and about ⅛ inch thick. Drape it over the top of each dough ball and press gently to adhere — it should stick without needing anything extra. Now score the topping with a concha cutter, a sharp paring knife, or the back of a thin knife in a shell pattern (curved radial lines from center to edge) or a simple crosshatch grid. Cut all the way through the cubierta but don’t cut into the dough.
9. Second rise. Cover the pans loosely with plastic wrap or a clean kitchen towel. Let rise 45–60 minutes until noticeably puffed. Meanwhile, preheat your oven to 350°F (175°C).
10. Bake. Bake for 18–22 minutes, until the base of the conchas is set and very lightly golden when you lift one with a spatula. The cubierta should look pale, matte, and barely colored — it does not brown. This is normal and expected. If your conchas are browning on top, the oven is too hot or they’ve been in too long. Pull them a minute early rather than a minute late.
11. Cool before serving. Let the conchas rest on the pan for 15 minutes before transferring. As they cool you’ll notice the buttery, sweet bread smell shifting from sharp-hot to soft and welcoming — that’s when they’re ready. They firm up as they cool and the cubierta sets to its classic slightly crumbly texture. The temptation to tear into them immediately is real. Resist it. (Or don’t. I never do.) ### Technique Tips Worth Remembering - The cubierta should not brown. If yours are going golden on top, pull them out earlier.
• The dough should be tacky, not sticky. If it’s sticking to your hands excessively after kneading, add flour one tablespoon at a time. But resist adding too much — extra flour is the enemy of a soft crumb.
• Butter goes in gradually. This is the most commonly skipped or rushed step and the one that matters most. One tablespoon at a time, fully incorporated.
• A warm proofing spot is essential. Cold kitchens slow things down significantly; if your kitchen is cool, your first rise may take closer to 2 hours. That’s fine — let the dough tell you when it’s ready.
Tips, Variations & Substitutions
Regional and Flavor Variations
• Concha de chocolate: Add 2 tablespoons of cocoa powder to the dough itself for an all-chocolate concha, then top with the chocolate cubierta. A deep, mocha-scented bread popular in Mexico City bakeries.
• Concha de fresa (strawberry): Add strawberry extract and pink gel coloring to both the dough and the cubierta for a full berry experience.
• Canela and anise in the dough: A pinch of ground cinnamon (canela) and ¼ teaspoon of anise extract added to the dough leans beautifully into traditional panadería flavor profiles — subtle but unmistakably Mexican.
• Explore the full pan dulce family: If this recipe works for you, the same enriched dough forms the base for cuernos (horn-shaped, sugar-coated rolls), hojaldras (flat, sugared discs), and cemitas (sesame-topped rolls from Puebla). The conchas are your gateway bread.
Dietary Adaptations
Texas Sourcing
Everything you need for conchas is at H-E-B: active dry yeast is in the baking aisle, and many H-E-B locations stock lard (manteca) in the refrigerated section near the butter — worth using if you want the most authentic texture. For Mexican cinnamon (canela) to add to the dough or cubierta, check the spice aisle at H-E-B or any Latin grocery store. Austin’s Central Market carries a rotating selection of artisan pan dulce if you want a reference point before you make your own batch.
• Vegan conchas: Substitute plant-based butter (Miyoko’s or Earth Balance are the most reliable), oat or soy milk for dairy milk, and 2 flax eggs (2 tablespoons ground flaxseed mixed with 6 tablespoons water, rested 5 minutes) for the eggs. The dough will be slightly less rich but very satisfying.
• Smaller batch: The recipe halves cleanly to make 6 conchas — perfect for a weeknight baking project when you don’t want 12 staring at you.
Serving Suggestions
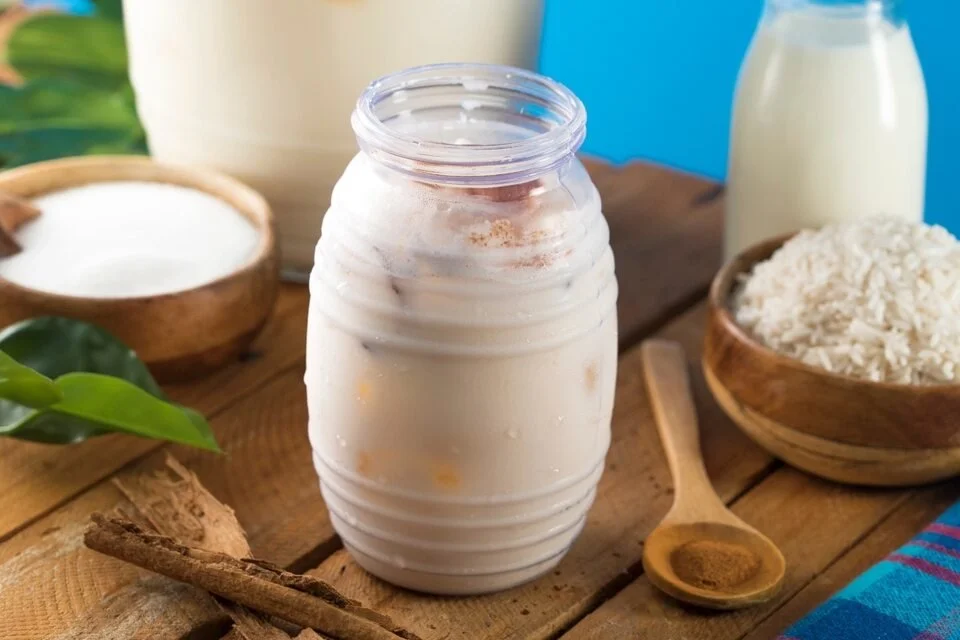
What to drink: In Mexico, pan dulce is practically incomplete without something to dip it into. The classic pairing is café de olla — strong, cinnamon-spiced coffee that soaks into the bread perfectly — or Abuelita hot chocolate. In many homes along the Texas-Mexico border, conchas are dunked into atole or champurrado on cold mornings. No forks required.
In millions of Mexican households, breakfast is exactly this: a concha and a mug of something hot. The classic pairing is a concha dunked into champurrado (thick, masa-thickened Mexican hot chocolate) or café de olla — coffee brewed in a clay pot with cinnamon and piloncillo. Abuelita or Ibarra brand Mexican hot chocolate also works perfectly and is available at most U.S. grocery stores.
For presentation, arrange a mix of pink, white, and chocolate conchas in a basket or on a wooden board lined with a colorful cloth napkin — this is exactly what you’d see at a panadería counter, and it looks stunning with essentially zero effort. The shell-patterned tops are the visual star; let them show. Serve whole and let people tear in.
For merienda (afternoon snack), slice a concha in half horizontally and spread it with cream cheese or a spoonful of cajeta (Mexican caramel). This is a beloved afternoon treat in many Mexican homes and one of the best things you can do with a slightly day-old concha.
Cultural & Historical Notes
Pan dulce in Mexico has a long, layered story that begins well before the panadería as we know it existed. Wheat was introduced to Mexico by Spanish colonizers in the 16th century, initially as a religious necessity — the Catholic Church required wheat flour for communion. Early Mexican bread was uninspiring, a pale imitation of Spanish loaves. The real transformation came with French influence.
According to La Monarca Bakery’s history of pan dulce in Mexico, the art of pastry-making took deep root during the French occupation of the 19th century. By the time of the Second French Intervention (1861–1867), Mexico had been flooded with French bakeries, and skilled Mexican panaderos began absorbing and then radically reimagining French techniques — replacing butter with lard, adjusting sugar levels, and creating entirely new shapes with playful Mexican names. My Slice of Mexico notes that the French influence further intensified during the Porfiriato (1884–1910), when dictator Porfirio Díaz’s preference for all things French accelerated the modernization of Mexican baking culture.
The concha specifically — with its scored sugar shell — is believed to have emerged as a distinctly Mexican invention in the late 19th or early 20th century: the enriched European roll tradition reshaped by Mexican aesthetics and ingenuity. The name itself (shell) describes the visual pattern, and the cubierta technique — pressing a separate flavored paste over risen dough — has no direct French precedent. It is a Mexican original.
Today, the panadería holds a unique position in Mexican and Mexican-American cultural life. It is often the last neighborhood institution to close as demographics shift in a community — a cultural anchor. As La Monarca Bakery observes, the Mexican baking tradition became “one of the most inventive in the world,” producing dozens of distinct shapes and forms, each with its own name, occasion, and regional character. The concha is simply the most recognized of the family — the ambassador of pan dulce — beloved even by people who’ve never set foot in Mexico.
Conchas appear at Día de los Muertos altars (ofrendas) as offerings for the departed. They show up on Christmas mornings and after Sunday Mass and at every merienda break. Making them at home is not just a baking project — it is an act of cultural preservation and pride.
Frequently Asked Questions
Why didn’t my conchas rise — what went wrong? The most common cause is dead or expired yeast. Always proof your yeast first: warm milk + yeast + a pinch of sugar, rested 5–10 minutes. If it doesn’t foam, the yeast is not viable. Other causes: milk that was too hot (above 115°F kills yeast), or a kitchen that was too cold during the proof (below 65°F significantly slows activity). Give them a warmer spot and more time.
How do I keep conchas fresh after baking? Conchas are best within the first 6–8 hours of baking. Store at room temperature (not the fridge — refrigeration dries them out fast) in an airtight bag or container. Day-old conchas are excellent when warmed for 10 seconds in the microwave or split and toasted. They stay passable for 2–3 days.
Can I freeze concha dough or baked conchas? Yes to both. For dough: freeze the shaped, cubierta-topped (but not yet risen) conchas on a baking sheet, then transfer to a zip bag once solid. The night before baking, move to the refrigerator to thaw and do a slow overnight rise, then bake as directed. For baked conchas: let them cool completely, wrap individually in plastic wrap, then freeze in a zip bag for up to 2 months. Reheat directly from frozen at 325°F for 10–12 minutes.
Why did my cubierta (sugar topping) crack off the bread? This usually happens when the cubierta paste is too stiff or too dry, or when you didn’t press it firmly enough onto the dough before the second rise. The dough expands during baking and can crack a cubierta that didn’t adhere well. Make sure your butter is fully softened (not melted, not cold), and press the disc of topping gently but firmly onto the dough ball.
What’s the best concha cutter and where do I find one? A traditional concha cutter is a round metal stamp with radial lines that creates the shell pattern in one press. They are available at Mexican grocery stores, Latin cooking supply shops, and on Amazon for just a few dollars. In a pinch, the back of a thin-bladed knife or even a small pizza wheel works perfectly for scoring straight crosshatch lines — the look will be slightly different but just as charming.
Can I make conchas without a stand mixer? Absolutely. The stand mixer makes the butter incorporation step easier, but conchas were made by hand for generations before KitchenAid existed. By hand: mix the dough until shaggy, then knead in the butter tablespoon by tablespoon, squeezing it in with your fingers and folding until incorporated. Plan for a solid 12–15 minutes of hand-kneading total. The workout is part of the process.